Background
Along with more and more people receiving and starting to use the ZimaCube, we have observed more and more community users’ enthusiasm for the DIY direction. The entire ZimaCube design is very modular, but can be modified or optimized. At the same time, more and more community users are asking for recommendations and selection considerations for their own improved cooling systems. Therefore, we have written this content to provide enough information to the community.
Standard fan size
ZimaCube supports fans with a maximum voltage of 12V. You can DIY according to your needs

Standard fan and locating hole sizes
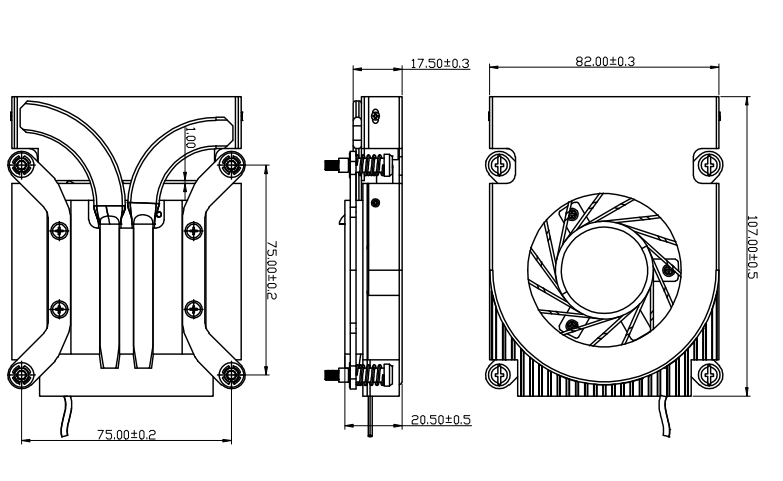
Standard fan screw size

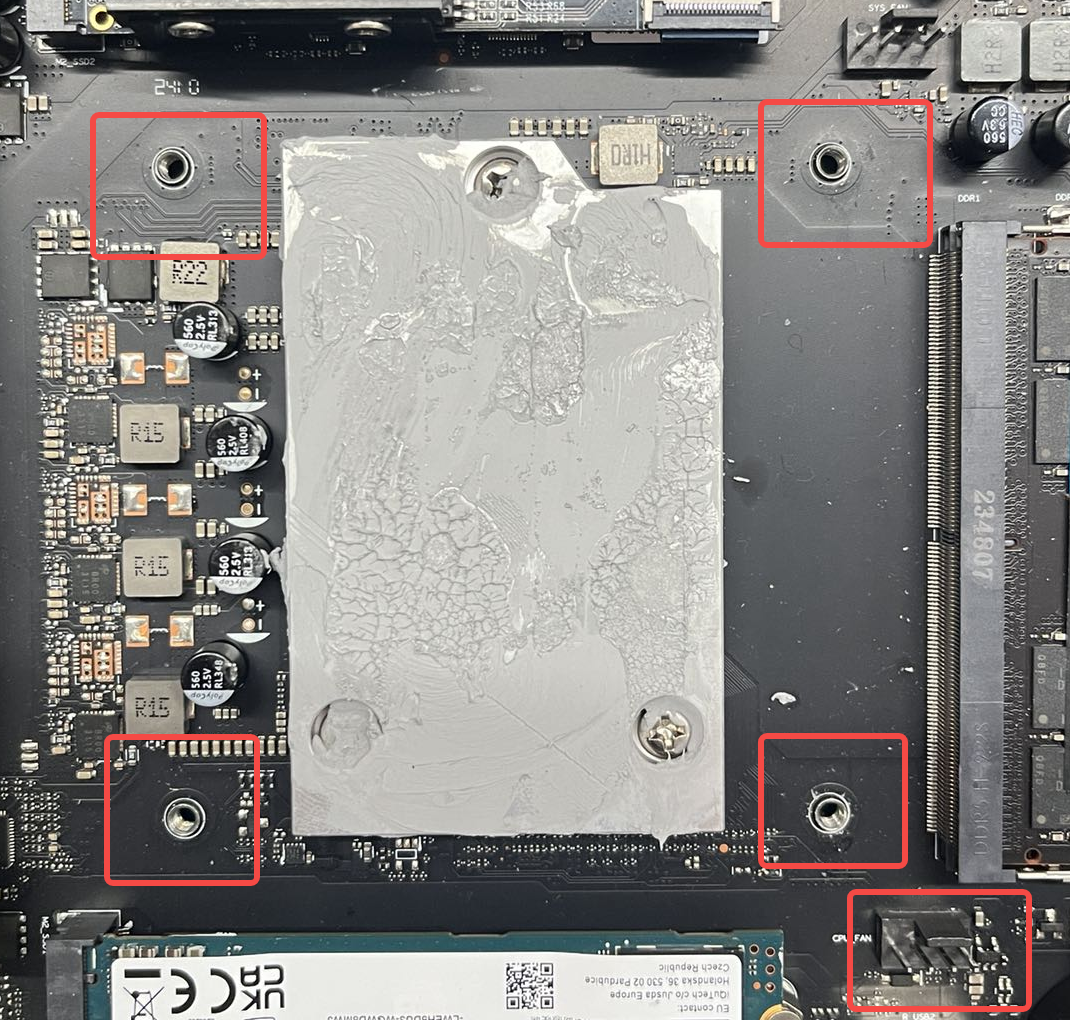
Cpu-fan
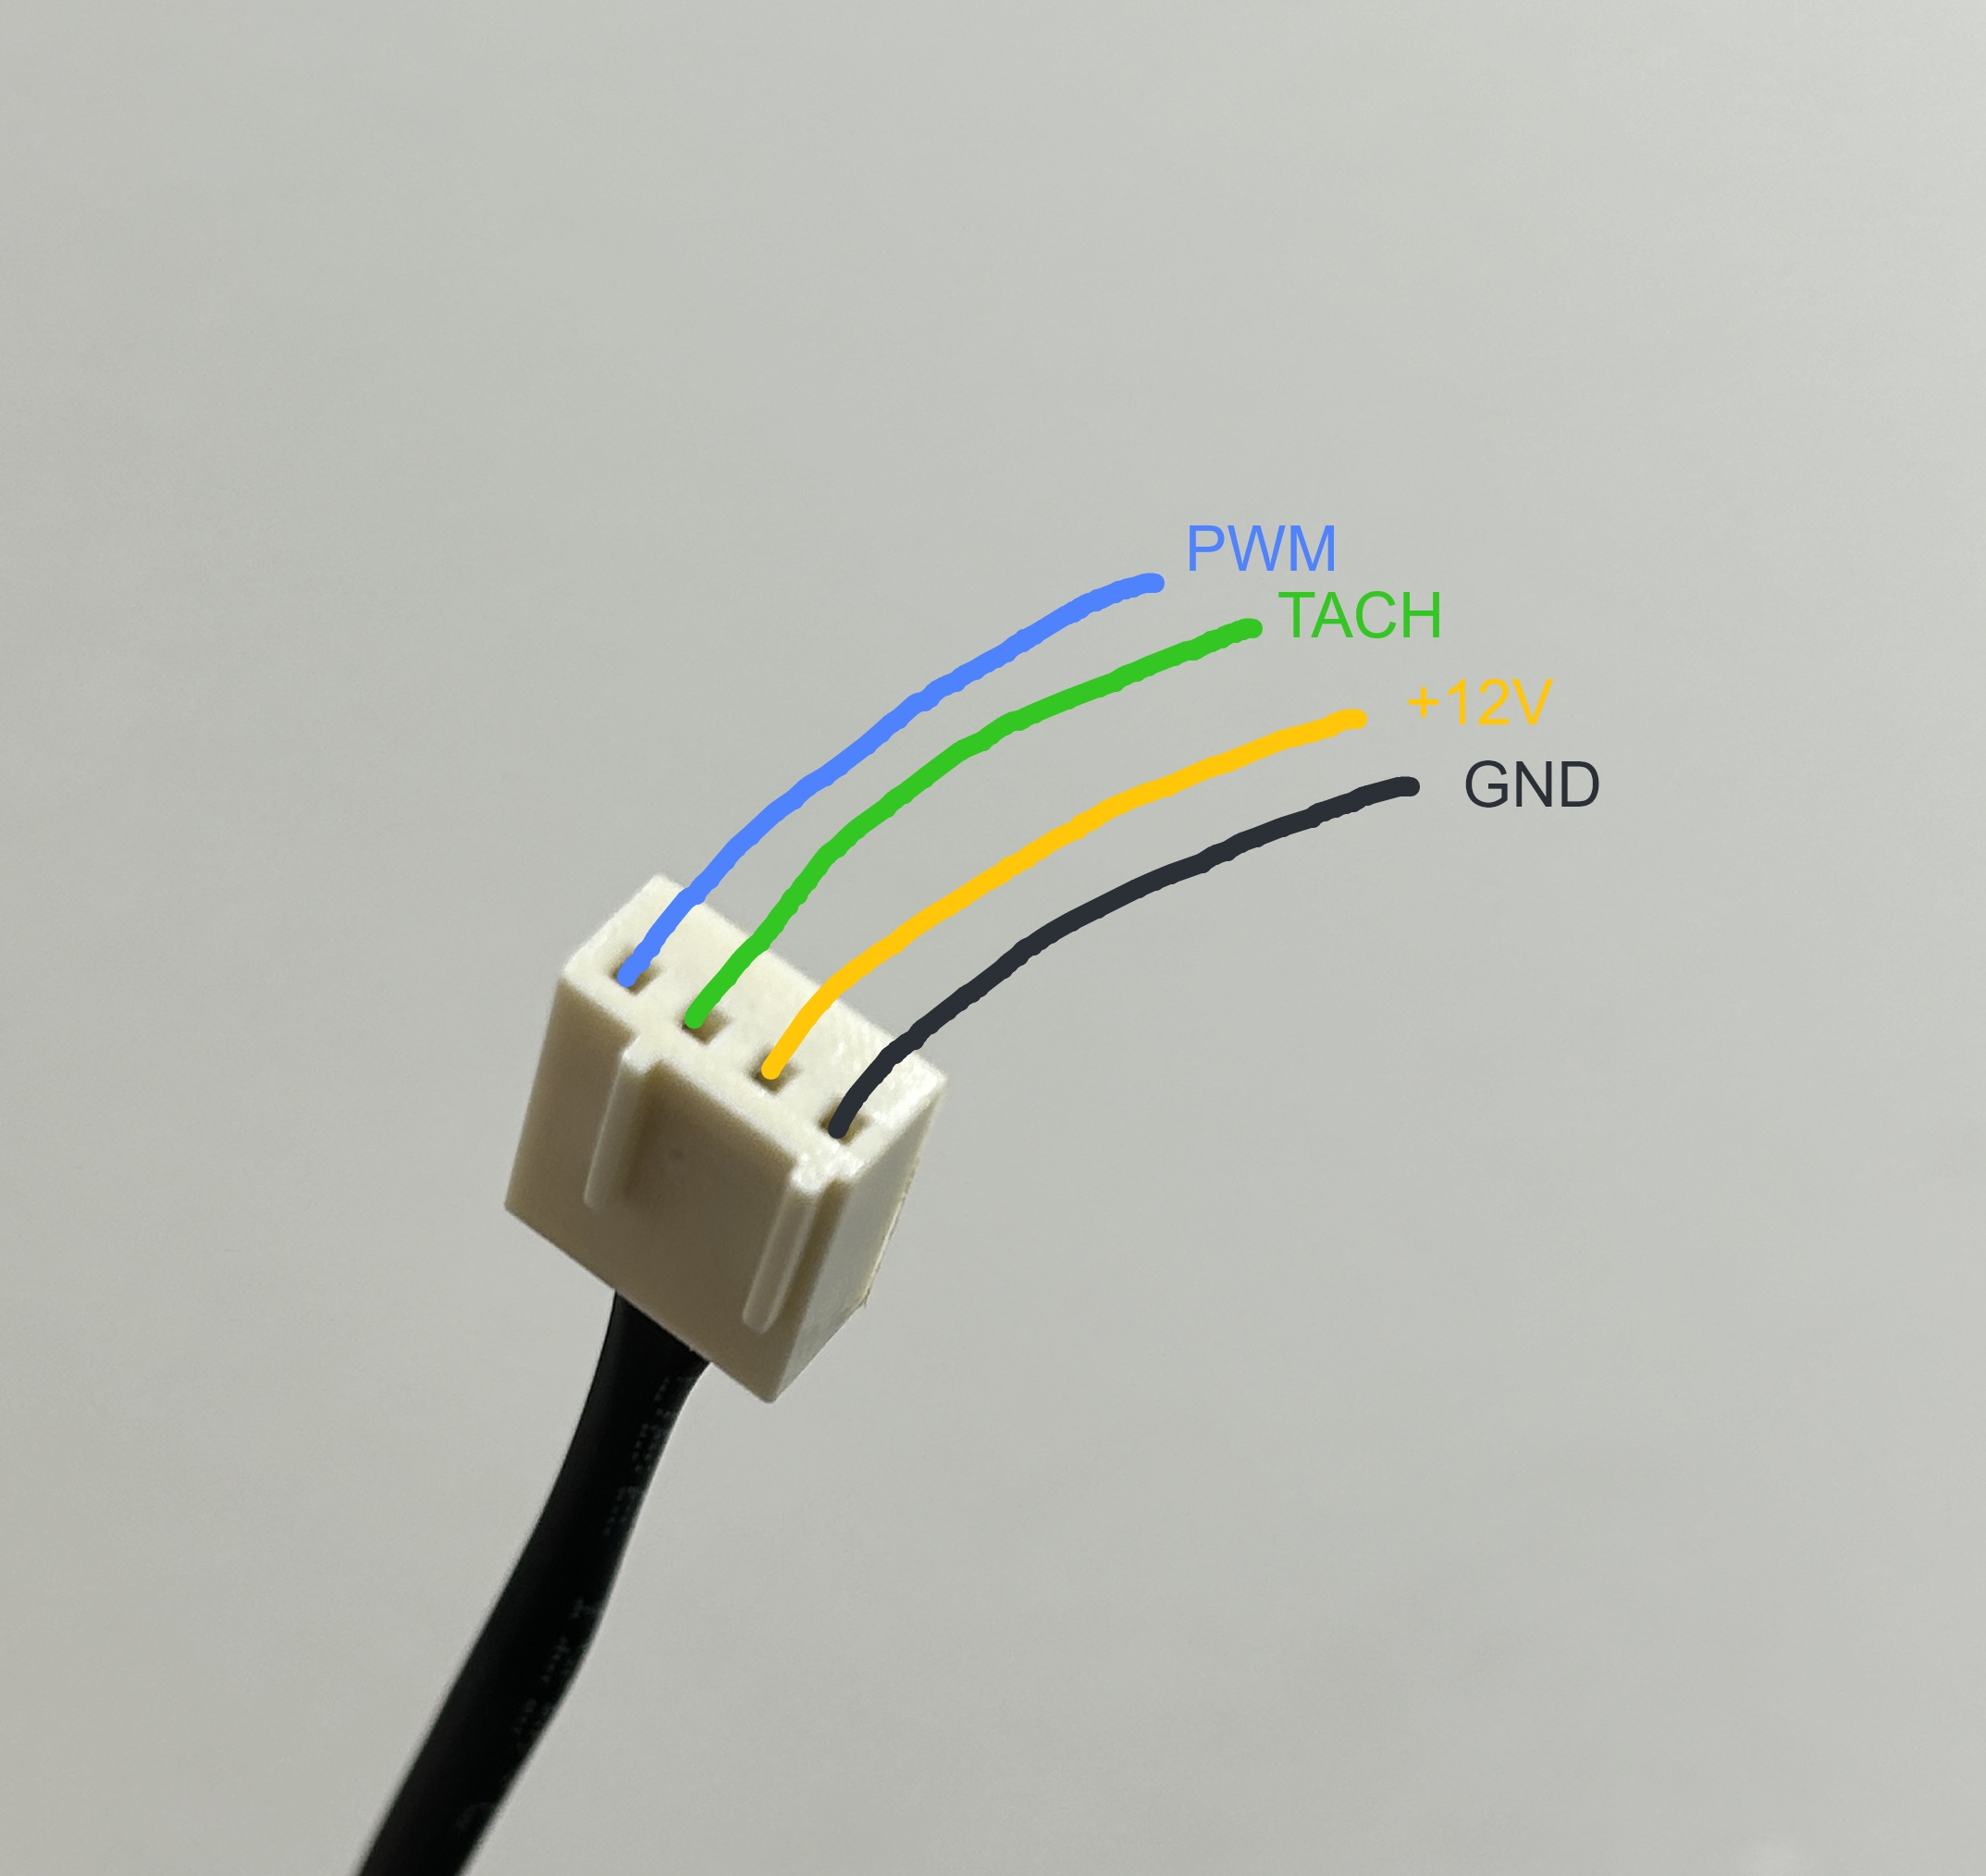
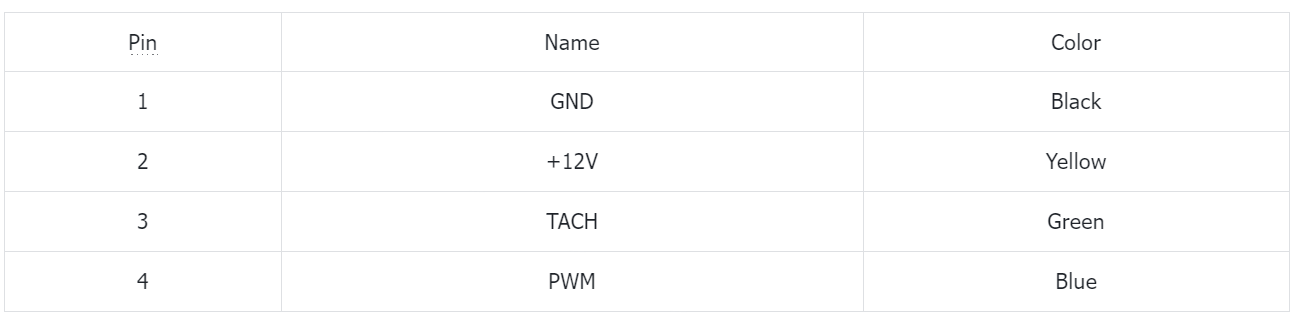
Fan plug wires
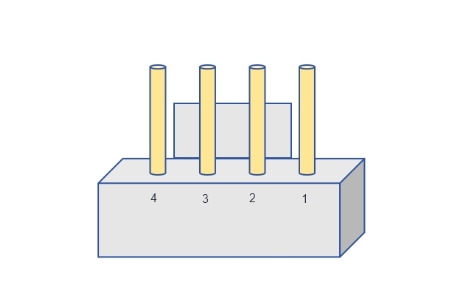
Base
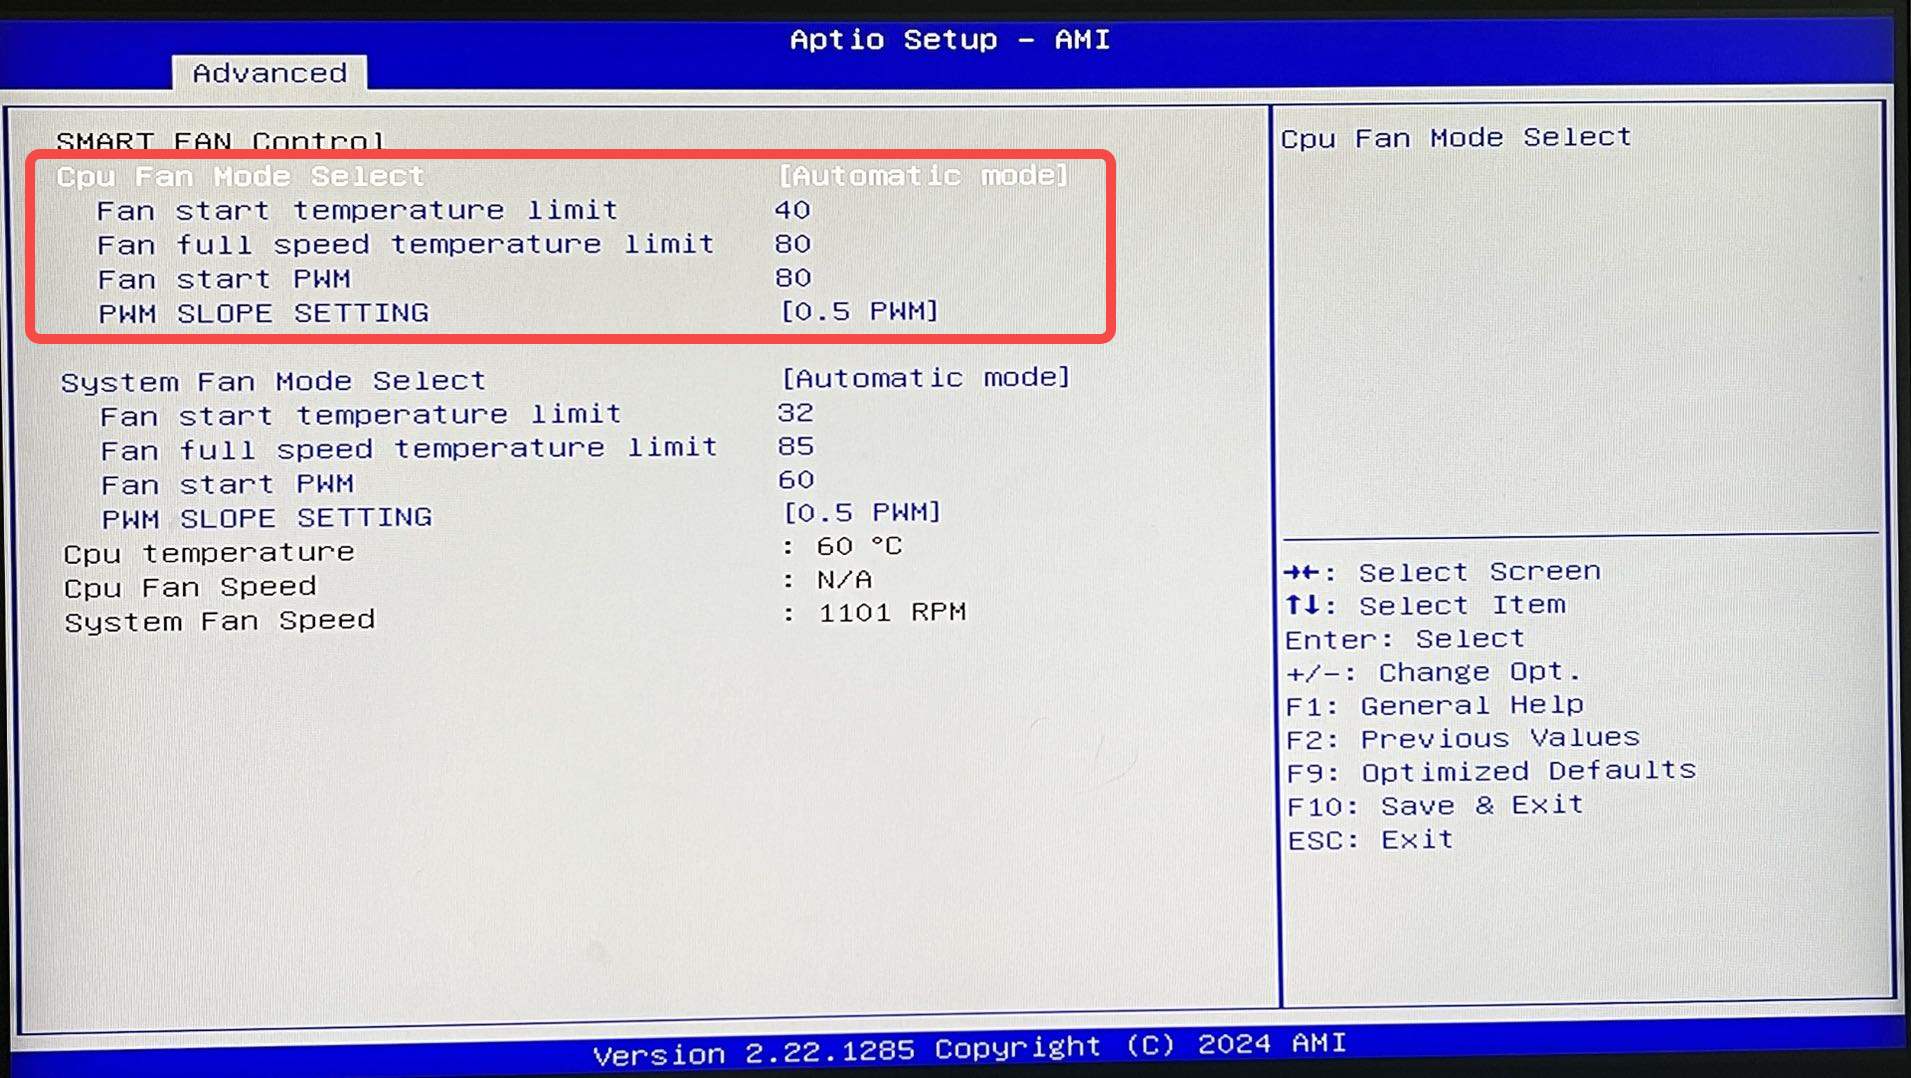
Bios fan configuration
- Select Advance, Hardware Monitor in Bios.

- Configure it according to your needs using the options under SMMART FAN Control.
Removal and replacement steps
- Remove the original fan by unplugging the fan power cord and unscrewing the four corner screws.

- Align the new fan with the holes on the motherboard, tighten the screws, and plug in the power cord.
Considerations for selecting third-party fans
Industry standard for chassis, select Intel 1156 standard holes.
The height of the selected model should be controlled within 8cm.